


 Christmas is fast approaching the Reich Duchy of Beerstein and everyone is excited. From all of us to all of you, Merry Christmas! Hopefully the Reich Duchy of Beerstein will be able to return to posting on a more regular basis after the Holidays.
Saturday, December 24, 2011
Merry Christmas to all, from all in Beerstein!
Christmas is fast approaching the Reich Duchy of Beerstein and everyone is excited. From all of us to all of you, Merry Christmas! Hopefully the Reich Duchy of Beerstein will be able to return to posting on a more regular basis after the Holidays.
Saturday, October 8, 2011
Russo-Swedish Battle a near run thing
 The Swedish center is moving forward.
 Russian infantry over run a Swedish artillery battery as Swedish troops enter the village on their left flank.
 Swedish Cavalry move the their left flank to counter the Russian Cavalry.
 A view of the Russian left flank.
 Although the Russians are taking many casualties, they are holding on.
 The cavalry battle has raged for some time with the Swedish gradually gaining.
 The Swedish infantry are running out of steam and are beginning to withdrawal.
 The Swedish infantry have consolidated their position and wait a Russian attack.
 On the Swedish left flank the cavalry have finally defeated the Russians, but they cannot save the day. The Russians won the battle but are in no condition to pursue the Swedish. A near run thing indeed.
Friday, September 23, 2011
Reich Duke gets a report of a Russo-Swedish battle
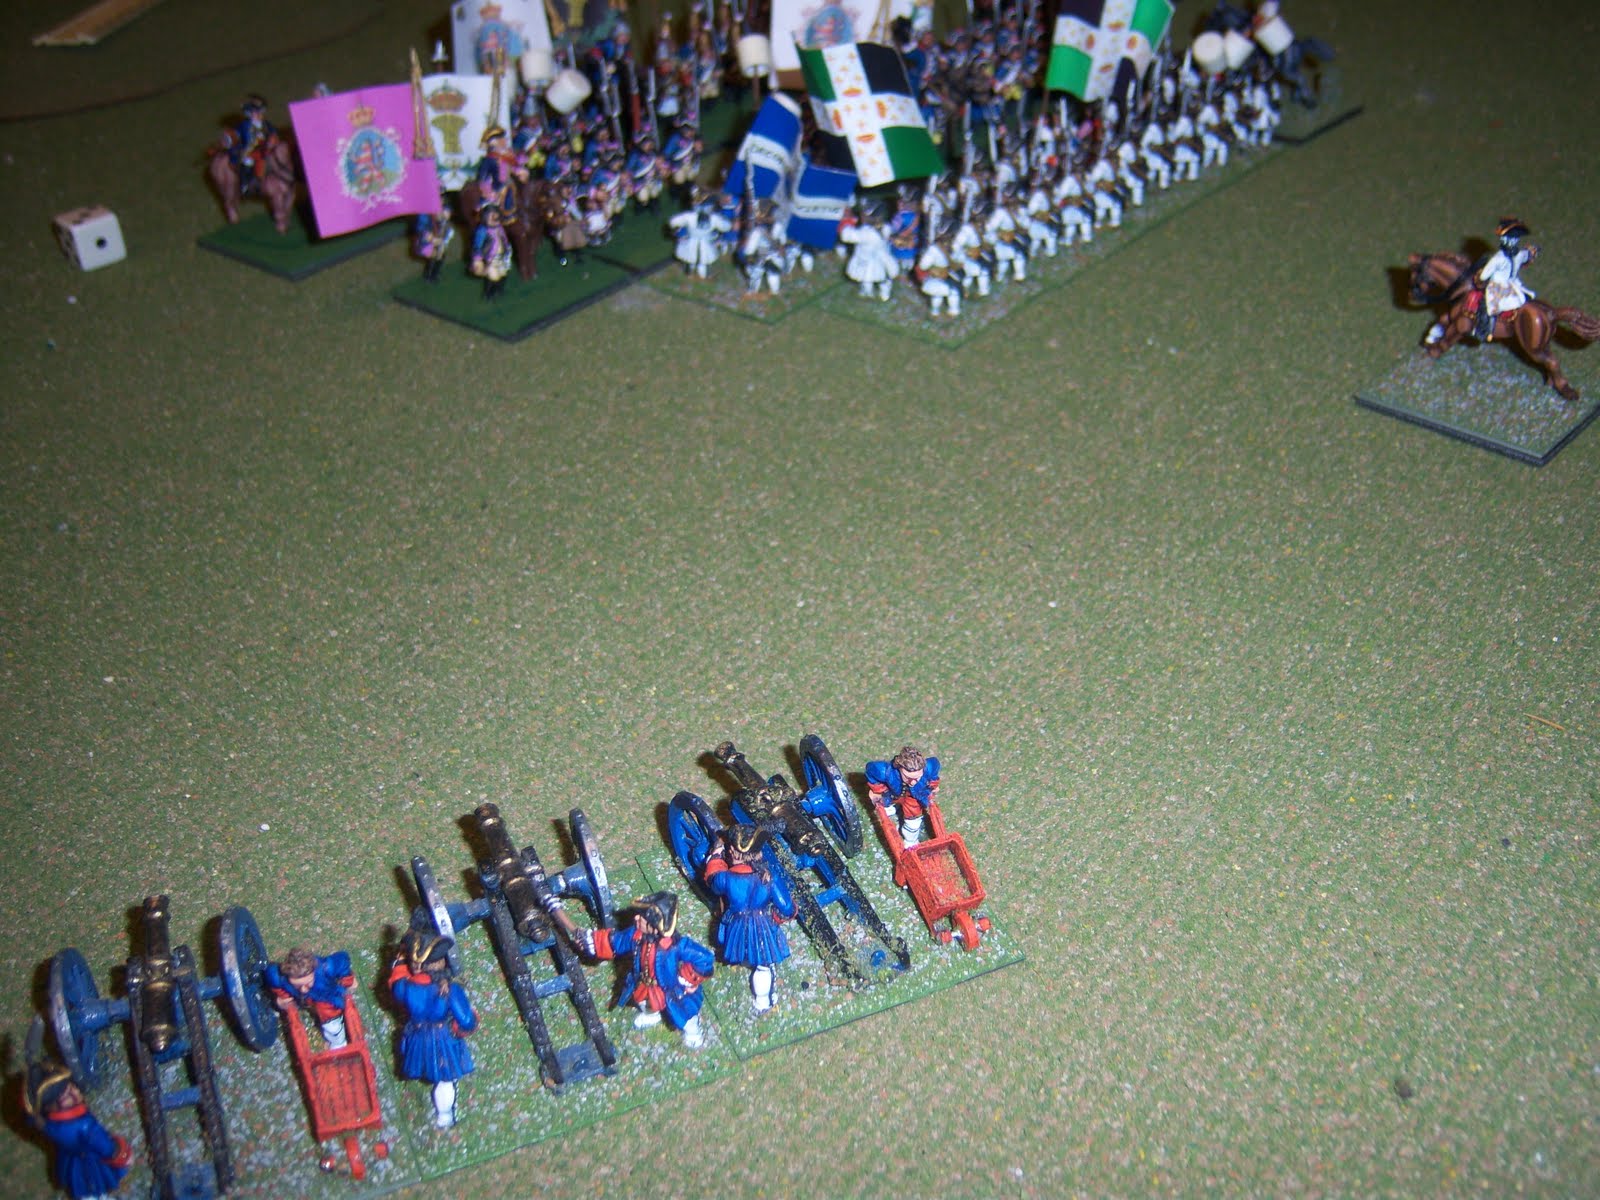
 A view of the Russian Battle Line from the Swedish side.
 A Swedish Infantry Brigade supported by the Swedish Dragoons.
 Two Swedish Brigades and a battery form the center of the Swedish line.
 Swedish Hussars and Heavy Horse skirt a village occupied by the Swedish Guard.
 The Russians anchor their battle line on a village located on their far right flank.
 The Swedish advance their line and prepare to attack the Russian held village.
 Another view of the Swedish deploying for an all out assault on the Russians.
 The Swedish Infantry have been able to push the Russians back have have entered the village.
Despite taking heavy casualties, the Swedish line is closing with the Russian center. Reich Duke Wilhelm is awaiting further dispatches to see the outcome of the Russo-Swedish battle.
Monday, September 12, 2011
Reich Duke Wilhelm withdraws from Naples
 Reich Duke Wilhelm summons reserves to stem the Sicilian attack in the center.
 Beerstein Infantry attack and overrun the Sicilian Heavy Battery.
 The Sicilian Heavy Cavalry attack the Beerstein Loyal Pensioners and are repulsed.
 On the Beerstein left flank, the Sicilian Grenadiers are victorious and can only be stopped by the valiant counter attack of Prince Wilhelm and the Holstein Leib Hussars.
 On the Beerstein right flank, all efforts to drive off the Sicilian Infantry fail.
 The situation is only stabilized by the presence of the Beeretein Cuirassiers.
 An overview of the closing phase of the battle. Although the Sicilians were near their breaking point, the Beerstein army failed its morale test and withdrew. The Beerstein Cavalry were able to cover their infantry's retreat as the Sicilians were unable to follow up on their success.
 Tuesday, September 6, 2011
Battle for Naples part II
 Two Beerstein Brigades make a mad dash to take an unoccupied Naples.
 As the Sicilian right advance, the Beertsein cavalry retire behind their infantry.
 A better view of the retiring Beerstein cavalry.
 The Sicilian rigt flank are seen attempting to envelop the Beerstein left flank.
 As the cavalry try to reform behind their infantry, the Beerstein Infantry form a hingle behind the Slitz Battery.
 The Beerstein Infantry have occupied Naples and await an attack in their center. The conclusion of this near run battle will be seen in the next dispatch. By the way, all photos can be expanded twice to provide greater detail.
Sunday, August 28, 2011
The Sicilian Campaign renewed part I
 After reorganizing his army, Reich Duke Wilhelm advances on Naples.
 Reich Duke Wilhelm plans to attack Naples with the two infantry brigades on his right flank.
 The cavalry on the west flank are to move further west to entend the Sicilian line.
 The plans seems to be working as the infantry are moving toward Naples unchallenged.
 The Sicilian Infantry, which was held in reserve in the center, begins to react to the Beerstein advance on Naples.
 Reich Duke Wilhelm watches as the Sicilians advance on his left flank and move their reserve infantry toward Naples. He is confident his infantry will occupy Naples long before the Sicilians realize they have been out maneuvered. Further dispatches to follow.
Wednesday, August 10, 2011
Battle of Alsfeld part II
 On the far right of the Hesse-Boozewick line their numbers are being to turn the battle in their favor. The Crown Royal Garde zu Fuss and the Glenlivet Fusiliers managed to double up on a hapless French Battalion and exact heavy casualties. Meanwhile the Meyers Musketeers reengaged the same French unit and forced them back an additional several hundred paces.
 Schenley's Musketeers can been seen pressing their assault on the village of Alsfeld. After an intense hand to hand fight, Schenley's Musketeers gain a firm foothold inside the village.
 The French Artillery continue to pound Hesse-Boozewick infantry as the French Infantry press home their attack on Murphy's Musketeer. Although both sides sustained heavy casualties, the French forced poor Murphy's boys back several hundred paces.
 A view of the second round of the cavalry battle as seen from behind the French line. Despite the gallantry of the Hesse-Boozewick Dragoons, both regiments were pushed back and sought refuge behind their infantry.
 On the extreme right of the French line, the heavy brigade brace themselves for a charge of the Chivas Regal and Teacher's Cuirassiers. The Boozewick Cuirassiers quickly routed their French counterparts.
 In the center of the battle line, the Boozewick Artillery begin to exact heavy punishment on the French Battery who were unable to defend themselves.
 The Hesse-Boozewick Cuirassiers renew their attack on the French Heavy Cavalry and put them to flight again.
 Sensing victory the Boozewick Dragoons rally and attack the stunned French Dragoons.
 After a see-saw battle, Schenley's' Musketeers continued to hold their ground and push the French deeper into Alsfeld. The battle outside the village was a total Boozewick victory. The Crown Royal Garde zu Fuss overwhelmed and captured a French Battalion complete with it's flags. The French army sensing a complete rout began to retire from the field. Lord Calvert was content to hold the battlefield as his center was nearly broken by the continued vicious attacks of the French Infantry and artillery. All and all, a fine day's work!
Friday, August 5, 2011
Battle of Alsfeld part I: Duchy of Hesse-Boozewick vs the vile French
 On the far left of the Hesse-Boozewick line Brigadier Graf Hiram Walker's Cuirassiers deploy. To their right is his his brothers infantry brigade. Brigadier Baron Johnny Walker "Black" leads the Seagrams Fusiliers and the Ballantine Musketeers. Brigadier Dunhill massed his brigade on a small hill facing the French center. His Glenfiddich Grenadiers and Murphy's Musketeers were merely to demonstrate and hold the French in place.
 In the center of the Hesse-Boozewick line, Marshal Lord Calvert positioned the White Horse Battery. To the right of the battery, Brigadier Prince Jack Daniels brigade is formed up in column of attack. His orders were to attack the village of Alsfeld with the Schenley's Musketeers using the Meyers Musketeers as support.
 On the Hesse-Boozewick far right is Brigadier von Jameson's Glenlivet Fusiliers and the Crown Royal Garde zu Fuss. Jameson's Brigade was to maneuver to the right of Alsfeld and support the main attack.
 The French aggressively advance an infantry brigade in the center while their Guard Brigade formed column and extended their line to their right. The French Heavy Cavalry can been seen moving to entend the French line further to their right. On the far right of the French line two cavalry brigades are formed up to face the Hesse-Boozewick cavalry.
 As the French Guard move into position, a heavy battery pivots to support the aggressive French advance in the center. Another French Infantry Brigade can be seen retiring from the Boozewick Artillery Battery attempting to form up on the out skirts of Alsfeld.
 Brigadier Dunhill's Brigade has come under fire from the French battery as the French Infantry advance on his position. Brigadier Graf Jim Beam's Dragoons have moved up to fill the gap between the Hesse-Boozewick Infantry and their Cuirassiers.
 Brigade Dunhill watches as the French approach and begins to hope Baron Johnny Walker's Brigade will turn and flank the attacking French.
 Meanwhile on the Hesse-Boozwick right, Prince Jack Daniels begins to double out his columns into line. The Meyers Musketeer, still in column, can be seen charging a French Infantry Battalion.
 From another angle, the Schenley's Musketeers can be seen assaulting the village of Alsfeld. As fate would have it, both attacks were won by the Boozewickers forcing the French to retire several hundred paces.
 On the Hesse-Boozewick left, the Dragoons attacked the French cavalry and drove both regiments back several hundred paces. The French Infantry can be seen fast approaching Baron Walker's Brigade while the French Artillery continues pounding his exposed infantry. The battle report will continue is future dispatches.
Subscribe to:
Comments (Atom)
